[참조!]
https://jiurinie.tistory.com/102
Spring Boot & Vue.js 연동 및 개발환경 구축
Spring Boot & Vue.js 연동 및 개발환경 구축 개발환경 Eclipse IDE Visual Studio Code Spring Boot 2.7.5 Vue@3.2.41 Gradle 7.0 여태까지 Spring에서 권고하는 방식인 Thymeleaf + HTML 기반으로 프론트엔드단을 개발하였는데
jiurinie.tistory.com
spring 설정먼저 하자!
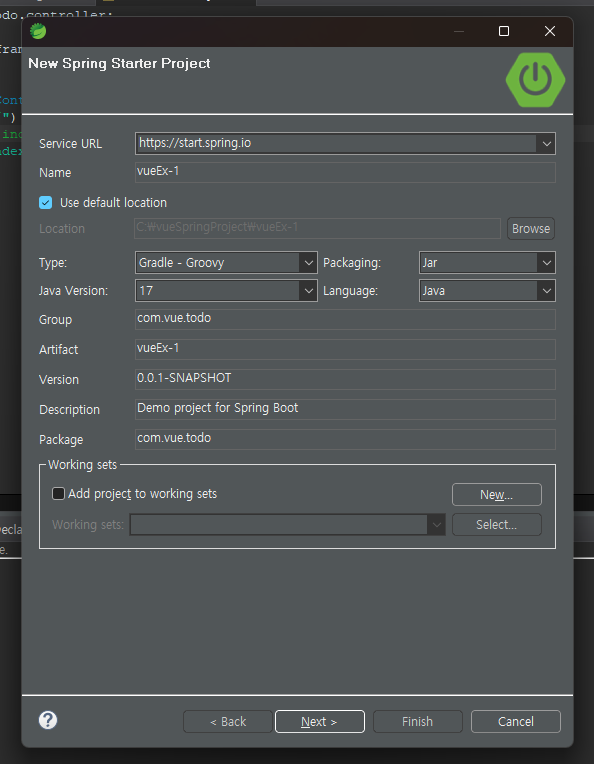
project name : vueEx
java : 17
spring boot version : 3.3.10
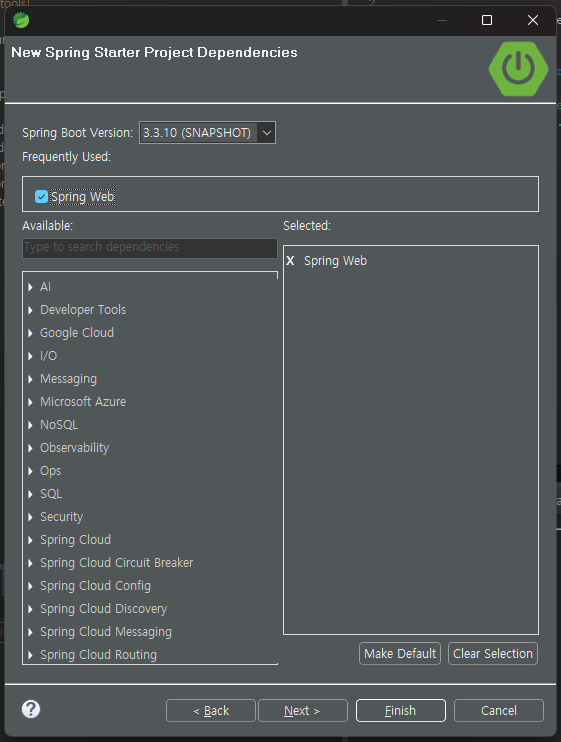
dependency : Spring web
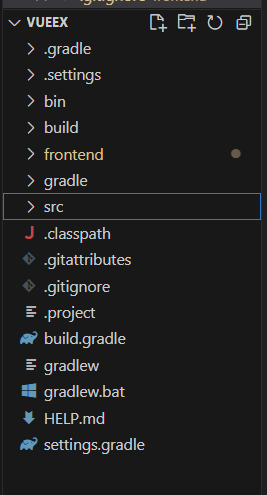
프로젝트 구조
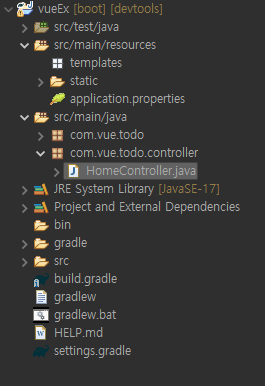
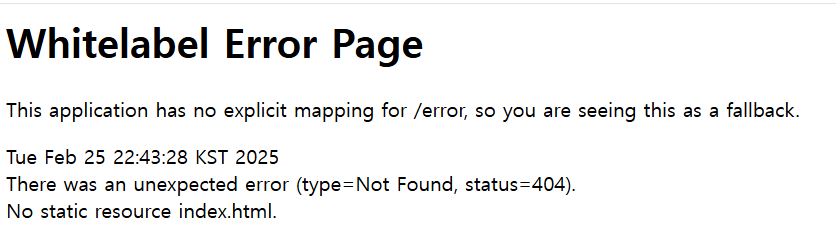
Homecontroller 하나 생성해서 spring 최초에 접속할 "/"가 열 파일을 설정해준다.
@Controller
public class HomeController {
	@GetMapping("/")
	public String index() {
		return "index.html";
	}
}
vue와 겹치지 않게 application.properties에서 포트도 변경해준다.
# port 설정
server.port=80
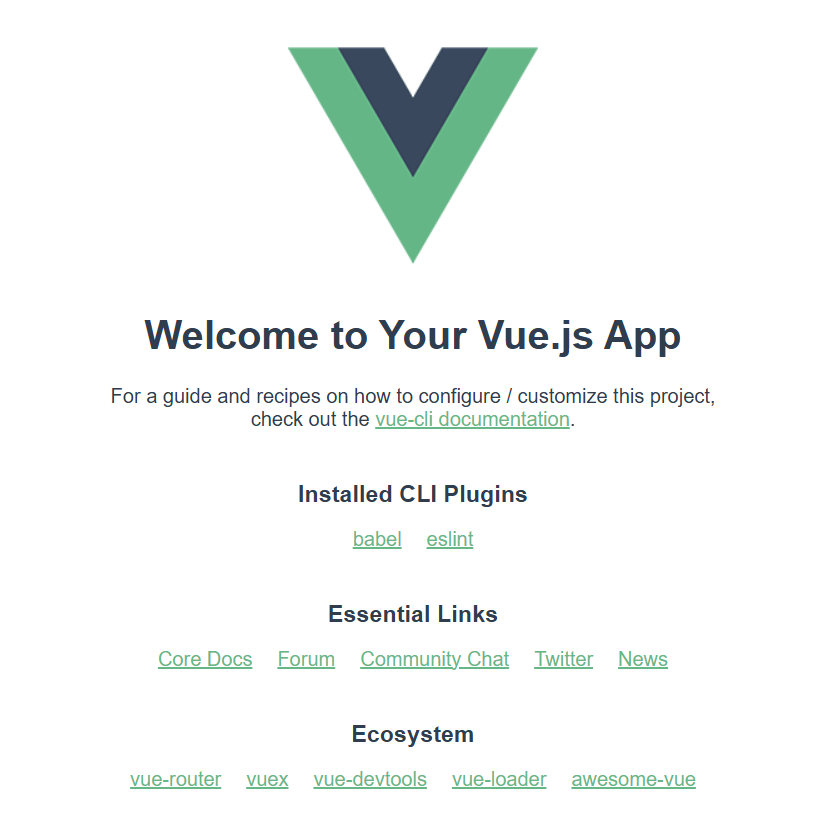
실행해서 url 창에 localhost를 쳤을때 이화면 나오면 성공
이제 vue.js 프론트 파일을 연결해줄 차례이다
vscode에서 생성한 springproject를 열어준다.
이제 vue를 사용하기 위해서 tool을 설치해주고 vue로 작업하는 frontend라는 폴더를 만들어줄것이다.
vue tool 설치
vs code에서 terminal창을 열어준다
vue tool 설치
npm install -g @vue/cli
설치 프로그램 확인
npm ls -g
vue 프로젝트 생성, 폴더명을 frontend로 해준다.
vue create frontend
이제 폴더를 frontend로 이동한다.
vue 프로젝트 실행
npm run serve
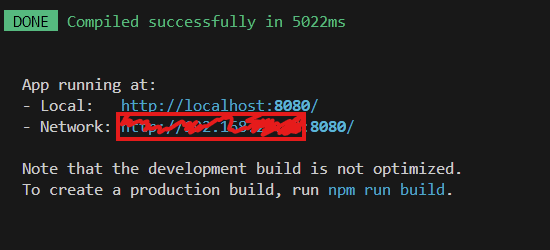
localhost:8080으로 시작하는 url을 ctrl누르고 클릭
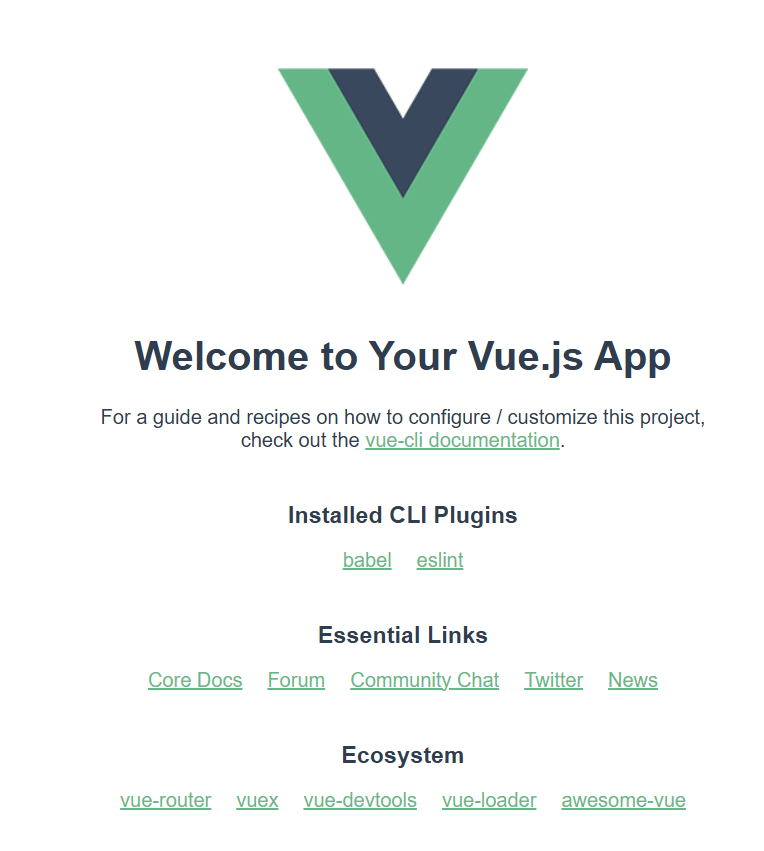
해당 vue 화면이나오면 성공
이제 vue와 spring을 연동시켜줘야한다.
frontend폴더 안의 vue.config.js파일을 열면 안에 vue프로젝트를 빌드하여 생성된 프로젝트를 spring프로젝트의 어디에 넣을지 설정해주는 부분이 있다
/src/main/resource/static 하위로 빌드되도록 설정해준다.
const { defineConfig } = require('@vue/cli-service')
module.exports = defineConfig({
  transpileDependencies: true,
  outputDir: '../src/main/resources/static', // Build Directory
	devServer: {
		proxy: 'http://localhost' // Spring Boot Server
	}
})
이제 vue를 빌드할 차례이다
npm run build

이제 이클립스에서 spring boot를 실행했을때 vue 화면이 뜨면 성공이다.